Behind the Transformation: An Exterior Painting Project by Milestone Painting
From peeling trim to a clean, finished exterior — a look at the prep and detail work behind one of our recent projects.
The finished exterior, photographed from the front lawn.
A fresh exterior looks great in the final photo. What makes it hold up is everything that happens before the first coat goes on.
On this two-story home, the old paint had started to peel and flake, especially on the trim. Here's how our crew took it from worn to finished: the original condition, the prep work, the details, and the result.
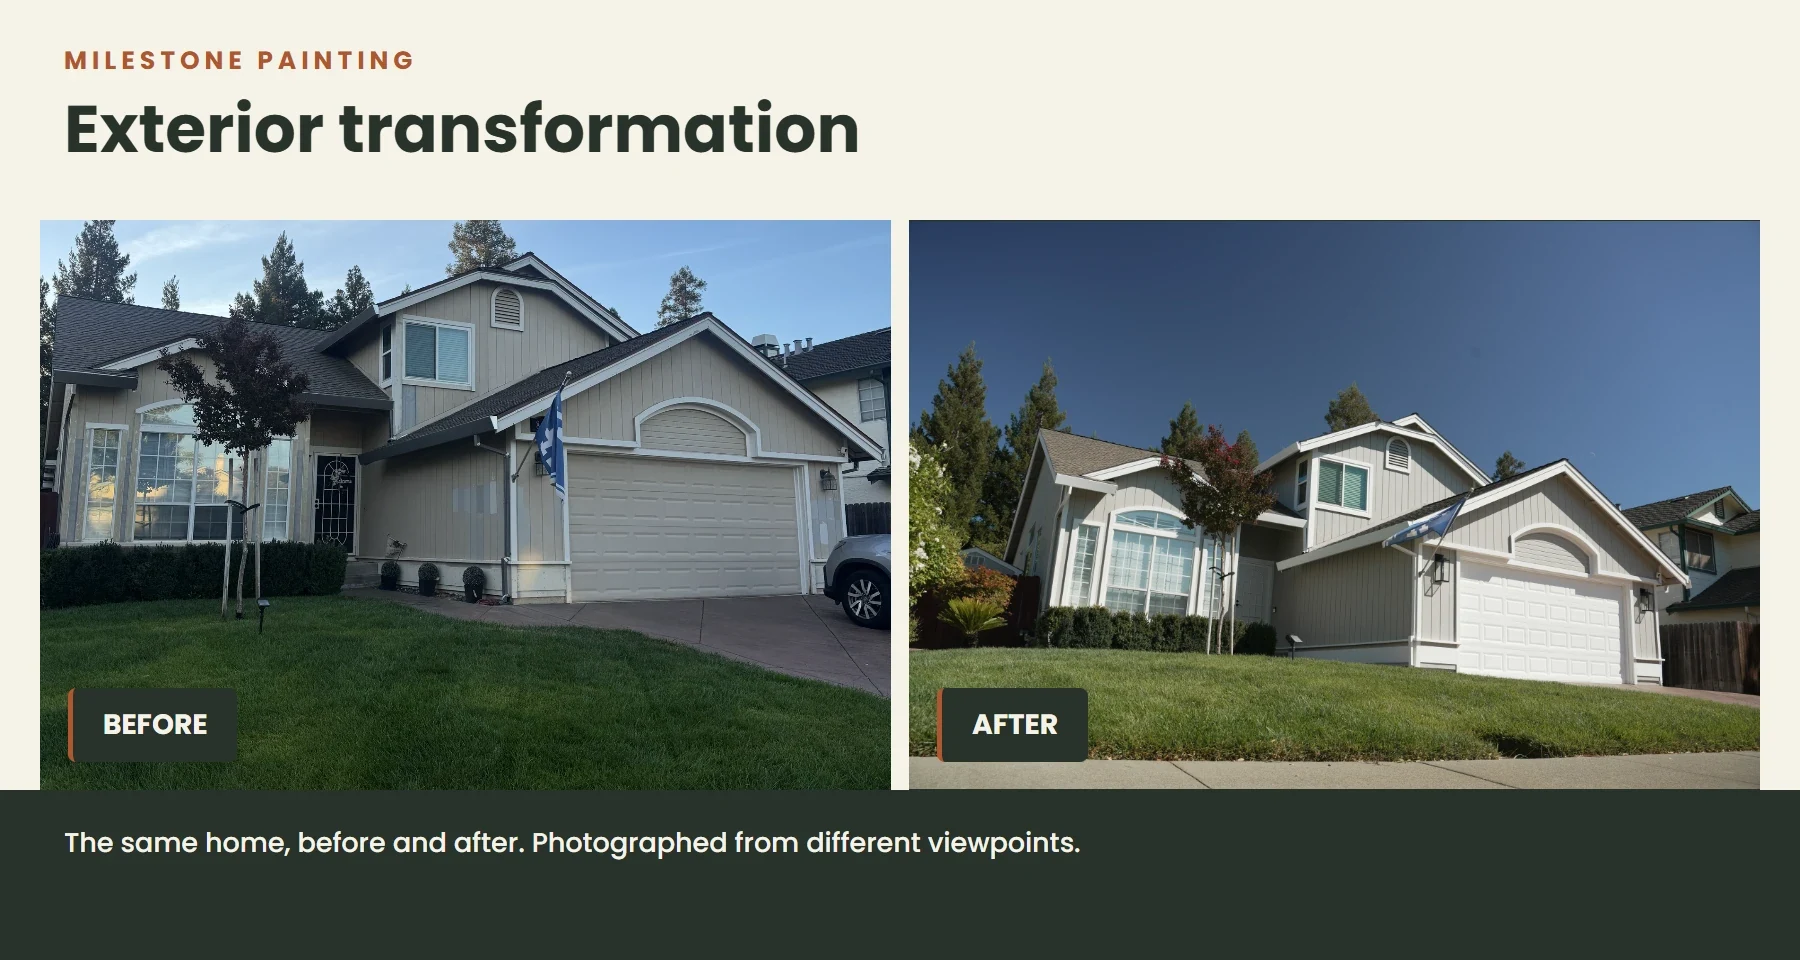
Before and after
Before
The home before the exterior painting project.
After
The finished exterior, photographed from the front lawn.
A quick note on these photos: the before and after shots were taken from different spots and in different light, so they don't line up exactly. It's the same home.
Where it started: failing paint
Paint that's peeling or flaking has already lost its grip on the surface, and new paint is only as good as what's underneath it. So before any color went on, the failing paint had to come off.
Cracked, peeling paint on exterior trim before preparation.
Prep first: scraping and masking
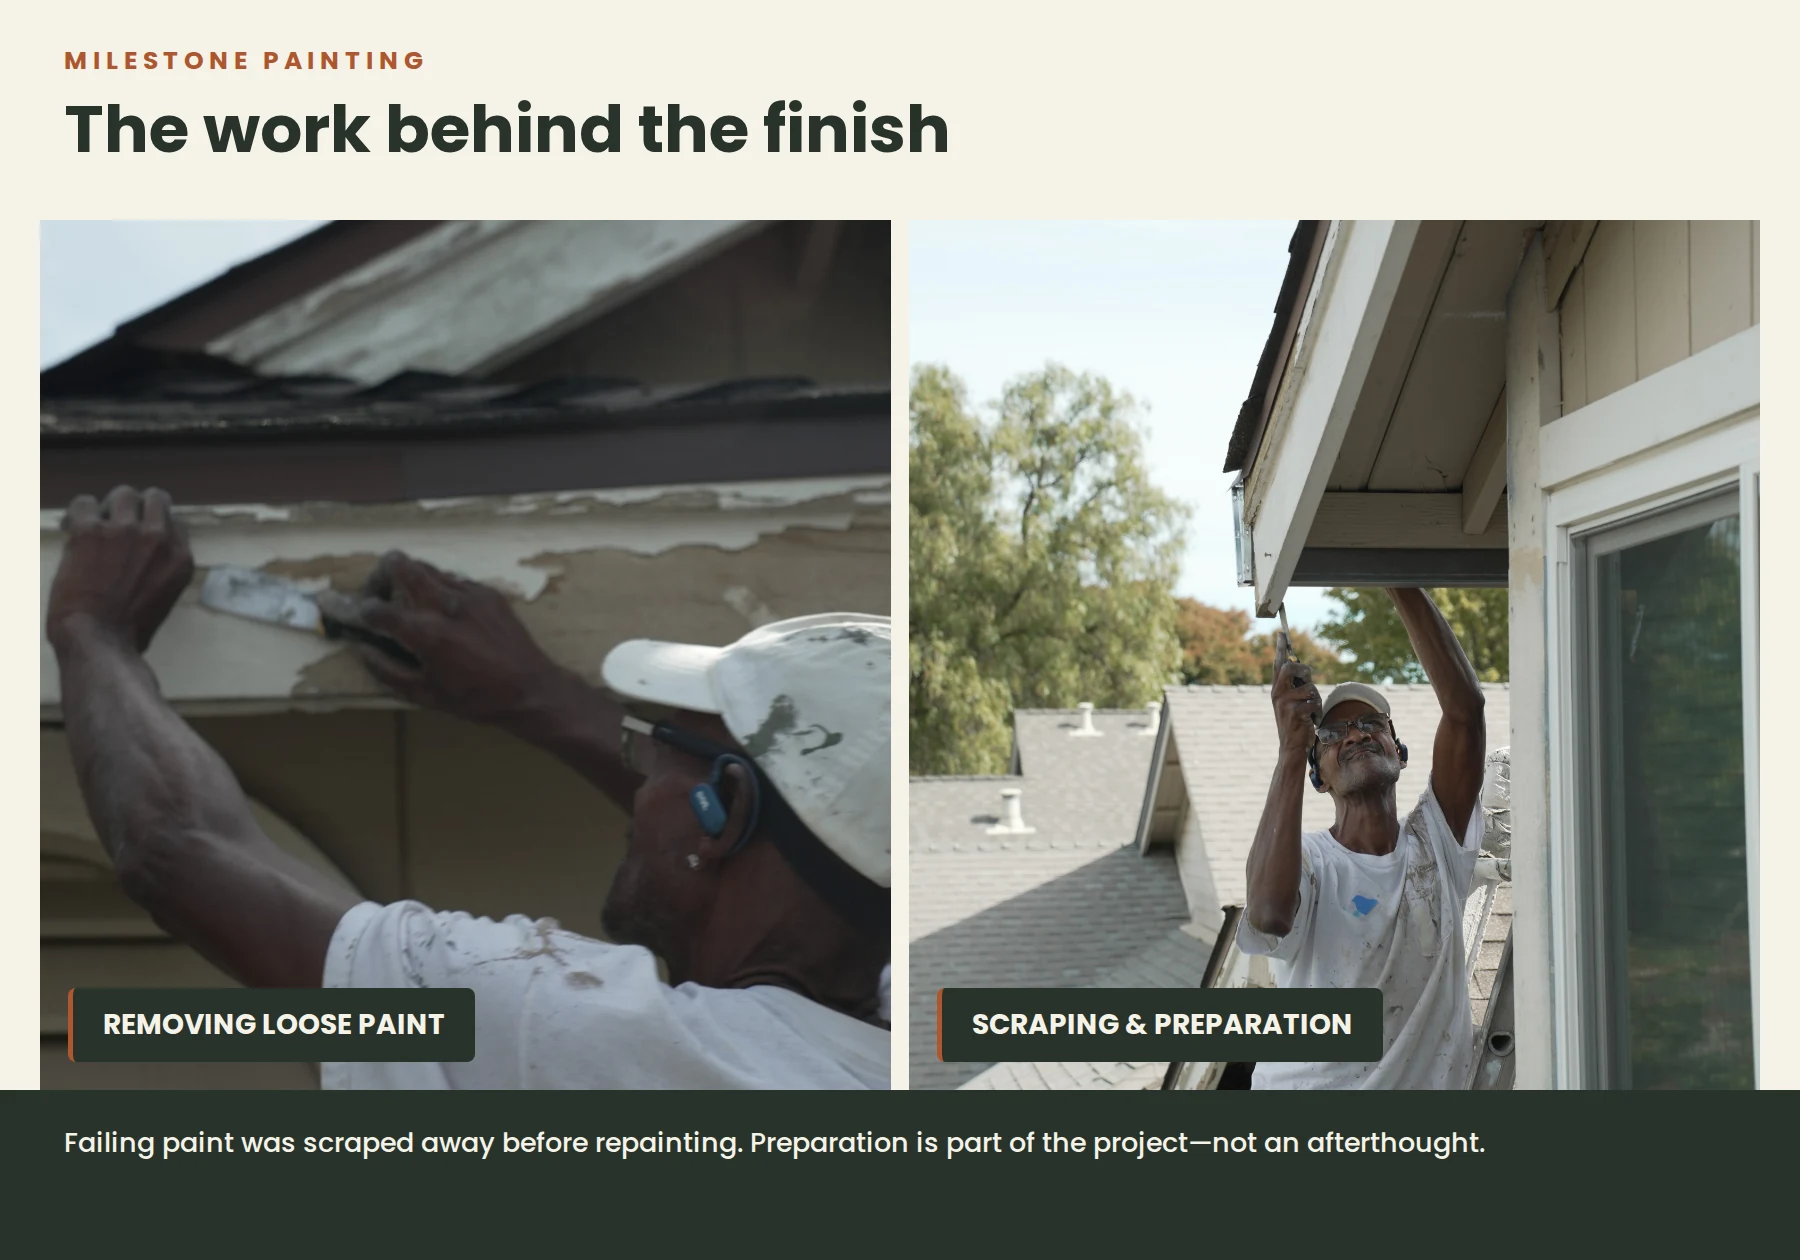
Our crew scraped the peeling and flaking paint from the trim, working along the edges and up under the eaves until the loose material was gone. Preparation is part of the project, not an afterthought.
Where the painted surfaces meet brick, the crew masked off the brick edges to keep the finished lines clean.
Removing loose paint
Removing loose, flaking paint from the exterior trim.
Scraping & prep
Scraping failing paint from trim before repainting.
The details: windows and doors
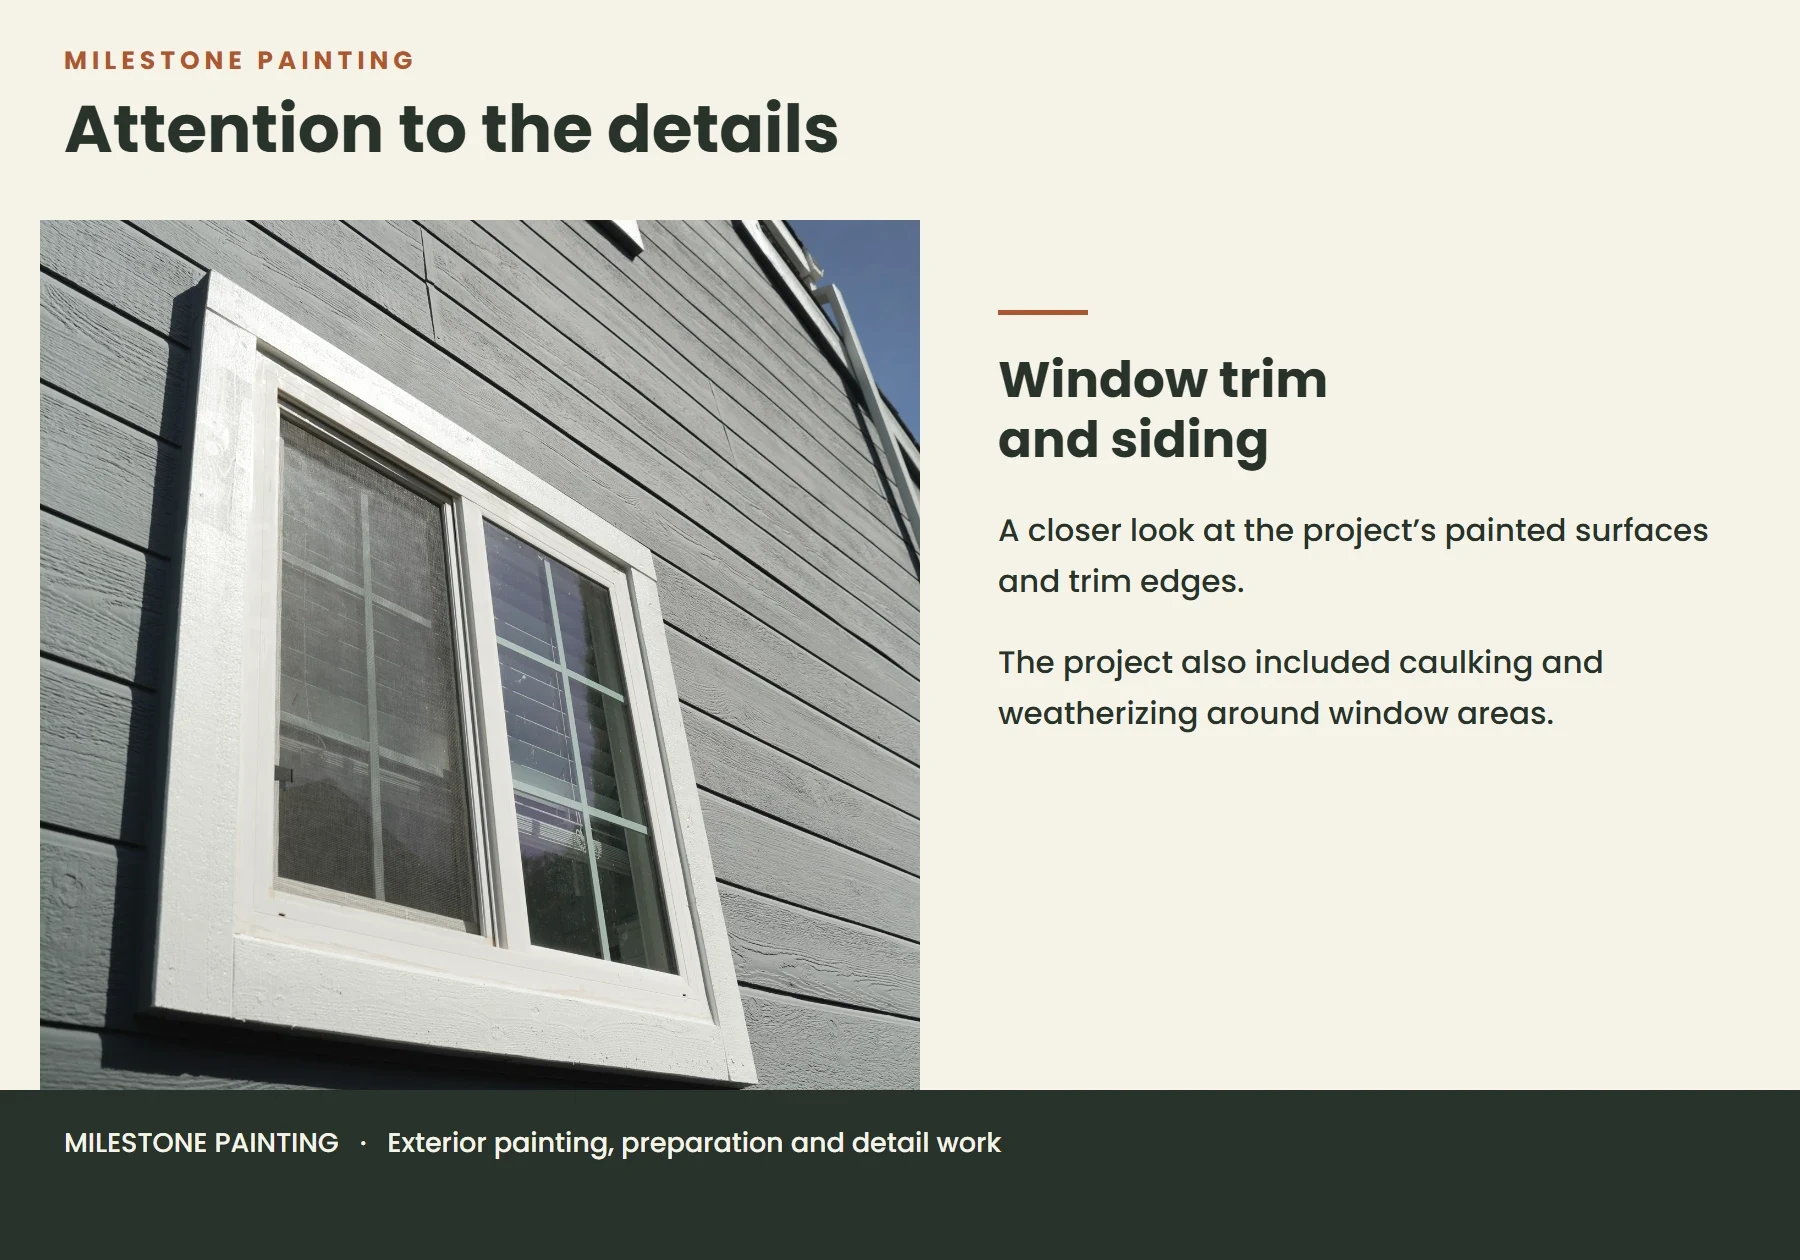
Around the windows, the crew caulked and weatherized before painting. It's work you won't really see in a photo, but it matters once the weather turns. The photo below shows the finished window trim and siding up close.
A closer look at the project's window trim and siding.
The front entry got the same care. We painted both the security door and the main front door. The door hardware and weatherstripping came off first, the surfaces were sanded, and then two coats went on.
What this project included
Scraping peeling and flaking paint from the trim
Masking brick edges for clean lines
Caulking and weatherizing around the windows
Painting the security door and the main front door
Removing door hardware and weatherstripping, sanding, and applying two coats
The result
Light siding, contrasting white trim, and a clean, finished look from the curb. Here's the finished exterior from a few more angles.
The finished front of the home, seen from the street.
The garage and front gable after painting.The rear of the home after painting.
A side wall and its windows after painting.Chimney and eave detail.